


Easy News is SharePoint Add-in that will help you create easily your corporate or site news and their content. Once your news created, you'll be able to create and add a beautiful, editable and responsive Slider on any page of your site to display them. All of this in a responsive way...
News Creation
Within the news creation page of the Add-in, you'll be able to create or edit your news with many different options:
- Edit your news main content with a built-in WYSIWYG editor that will enable you to personalize your text but also add images, videos and even tables
- Choose a different background color for each of your news. This can be either a new one or a reusable one that you will define as your company color in the settings section of the Add-in
- Choose a different background image for each of your news simply by uploading your images to the Add-in
News Slider
Insert the Add-in built-in Slider to display your news with many different options to choose from:
- The maximum number of news
- The order in which the news are displayed
- The layout of the slider

This section is a step-by-step guide that will help you create News, covering all the Add-in features:
Create News
Create Company Colors (for News Silder Background
Set up News Silder
Add News
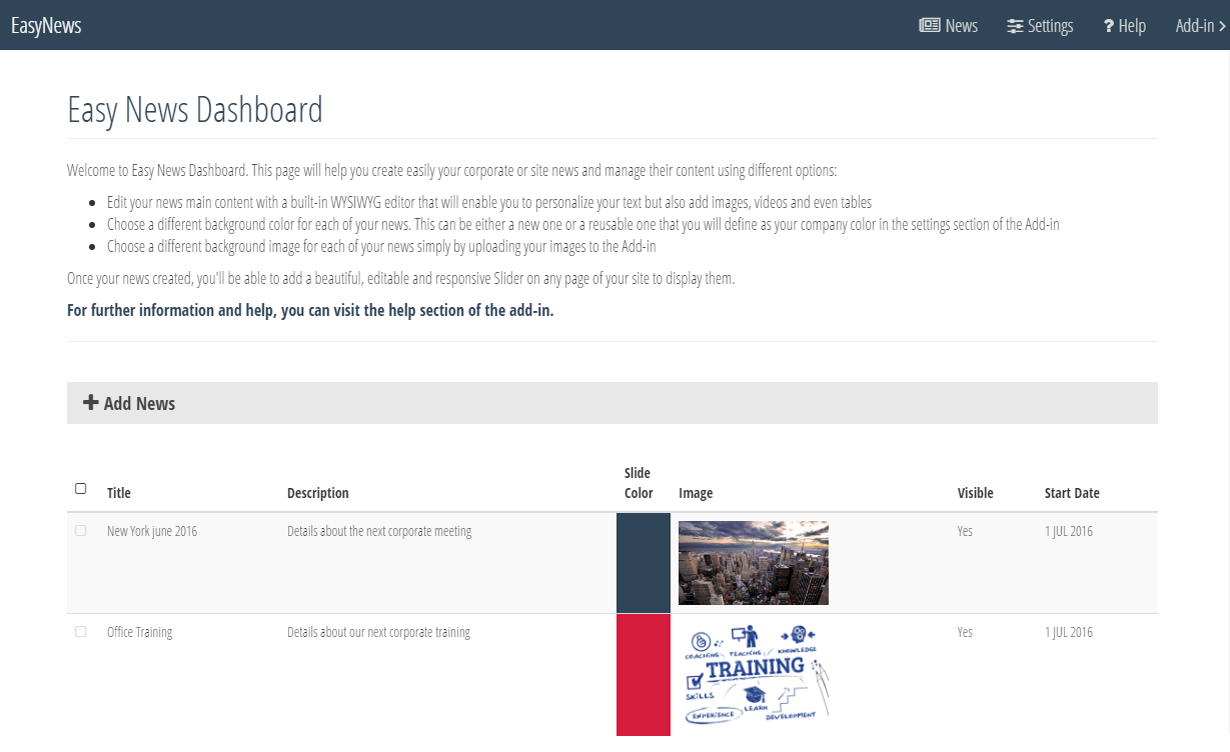
1. In your SharePoint 'Site Contents', Click the EasyNews tile to launch the Add-in
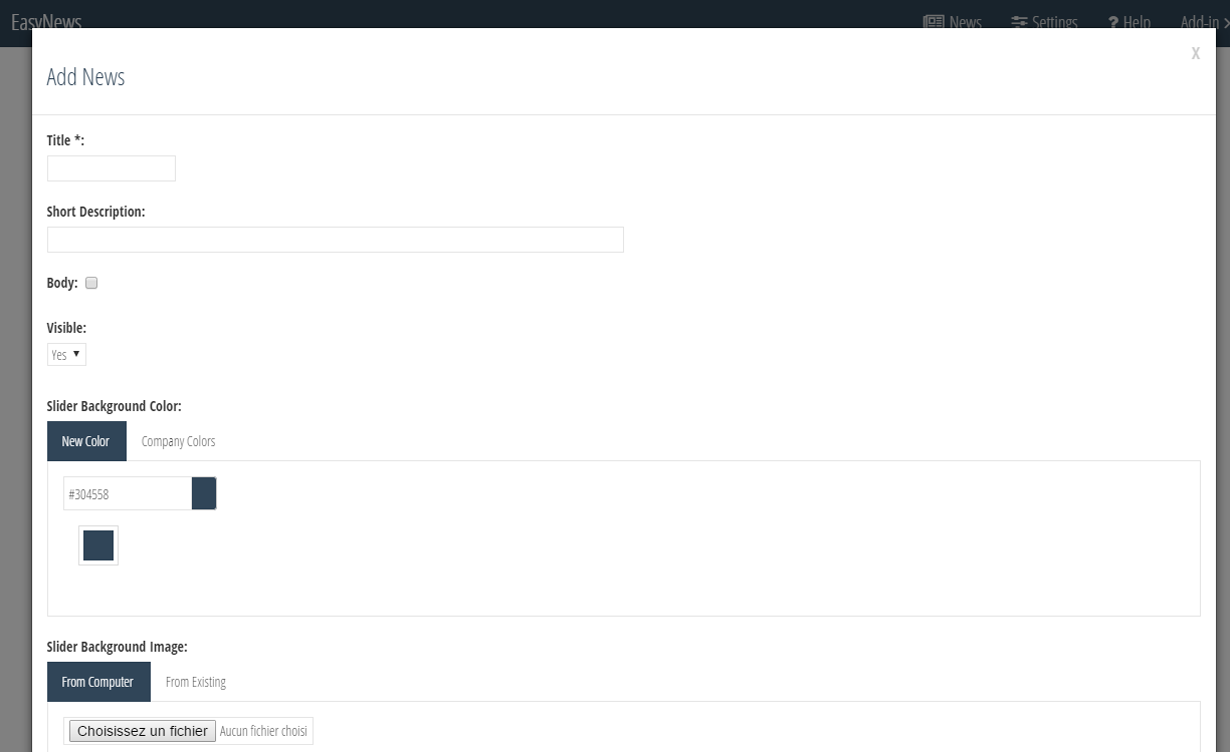
2. In the Add-in landing page, Click the Add News Button to launch the news creation pop-up
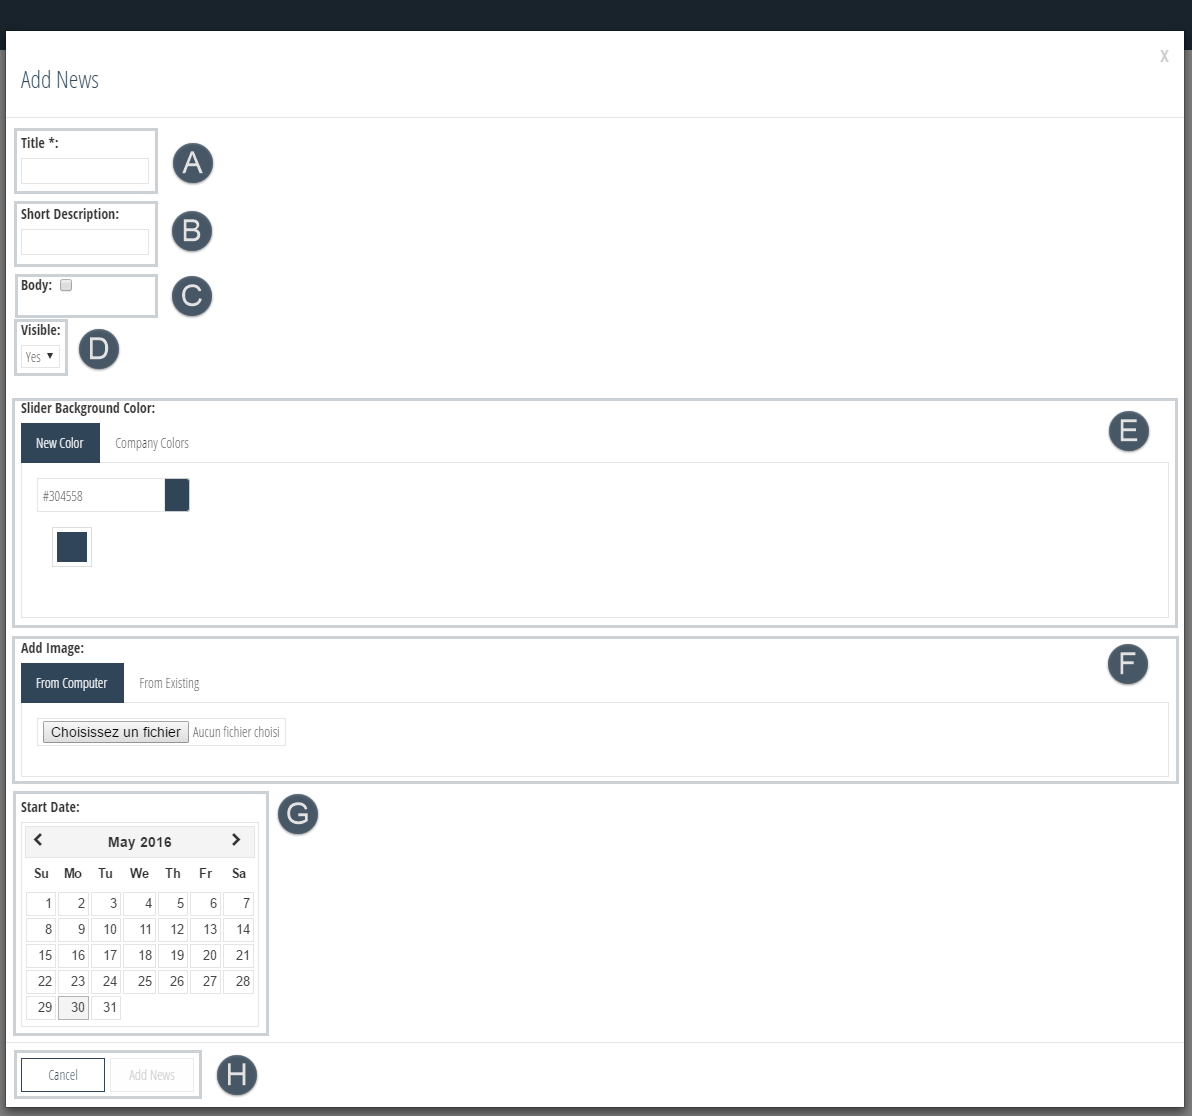
A. Title: this is the only mandatory field required in order to be able to create a news element. It will appear on the news Slider
B. Short Description: short text that will appear on the news Slider describing the news element
C. Body: core content of the news element. Once checked, the text editor will appear allowing you to :
Enter text and edit it (add picture, video, table, format text, etc...) with the custom editor
Add automaticaly a 'Read more' link on the news slider.
D. Visible: allows you to hide or show the news element from the slider
E. Slider Background Color: allows you to choose the news element background color within the slider in 2 ways:
-
Custom Color (New Color Tab)
Use the custom color picker by either entering the color code (RGB or HEX) or by selecting the color
-
Company Color (Company Colors Tab)
The Add-in features a settings section where you will be able to add your company's default color codes. Click here to see how.
Once the company colors are updated, they will appear on this tab
F. Add Image: allows you to upload the news element background image within the slider in 2 ways:
-
From your computer (From Computer Tab)
-
From already uploaded images (From Existing Tab)
All the images uploaded previously within the app are be stored and available from this tab
G. Start Date: allows you to pick the date from which the news element will be visible on the slider
H. Save/Cancel: Once the news ready, click the 'Add News' button to save it or the 'Cancel' button to cancel the operation
Update News
1. Select a News in the list and Click the Edit button to launch the news editinG pop-up
2. Make the necessary changes to the News content and options
3. Update News/Cancel: Once the changes finished, click the 'Update News' button to save it or the 'Cancel' button to cancel the operation
Delete News
1. Select a News in the list and Click the Delete button to delete the selected News
Add Company Color
1. In the Add-in main navigation, Click the Settings section
2. This page will enable you to add your company's default colors to be used as the news element background in the slider
3. Use the custom color picker by either entering the color code (RGB or HEX) or by selecting the color
Update Color
1. Select a color in the list and Click the Edit button to launch the color editing pop-up
2. Change the existing color with a new one by following the steps decribed in the previous section
H. Update Color/Cancel: Once the changes finished, click the 'Update Color' button to save it or the 'Cancel' button to cancel the operation
Delete Color
1. Select a color in the list and Click the Delete button to delete the selected Color